Pure Comments has been designed from the ground up to be simple to self-host and embed on your personal blog. Installation and setup is just a few steps:
- Download the latest source code.
- Upload it to your server.
- Add the Pure Comments embed code to your blog.
- Enjoy!
Pure Comments can be used on ANY site where you can add the embed script. You don't need to be running Pure Blog to use Pure Comments.
Hosting requirements
- PHP 8+
- PHP extensions:
pdo_sqlitesodiumcurl(for SES email sending)
- Apache or nginx
- Write access for PHP user to:
- project root (during setup, to create
config.php) db/directory (for SQLite and login rate-limit store)
- project root (during setup, to create
First run
Once you’ve uploaded Pure Comments to your server, navigate to its URL, and you will be greeted with the setup wizard.
It's VERY important that you do this immediately after uploading the Pure Comments source code to your server, as the setup page will be publicly available and anyone can fill it in.
This is what the setup screen looks like:
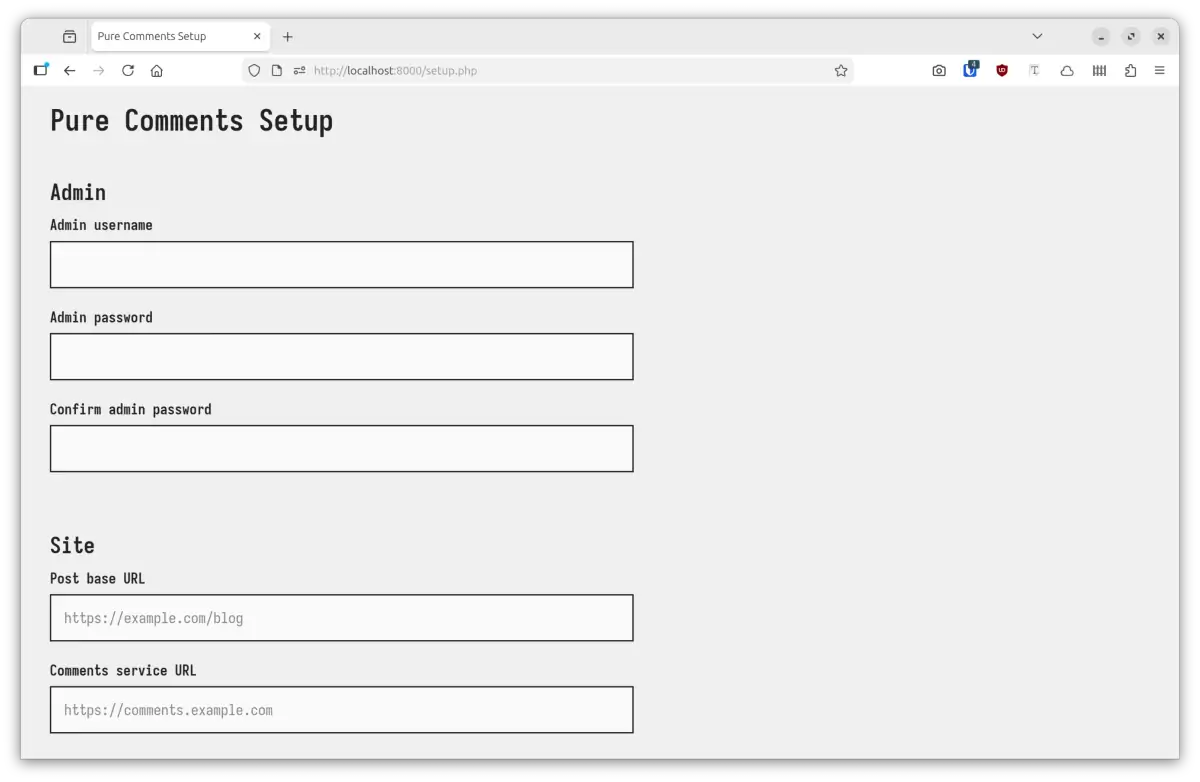
All you need to do is fill in all the relevant fields, hit the save button, and Pure Comments is installed and ready for use!
Once setup is complete, the setup.php is automatically deleted.
Here’s a reference guide on what the setup fields mean:
- Admin username: Username for admin login.
- Admin password: Password for admin login (will need to be entered twice).
- Post base URL: this is the URL where people will be reading your blog posts, so Pure Comments knows where to expect comments to be coming from.
- Comments service URL: the URL where you will be hosting your Pure Comments service from. Again, so the system can generate the correct embed code.
- Challenge question: these are optional fields that allow you to add an extra anti-spam prompt within the comment form. This could be a simple mathematical sum, or something specific to your site, like *what’s domain of this blog?"
- Author name: this is used as your name when your reply as admin from the dashboard.
- Author email: this is the email that’s associated with your admin reply comments, so you get notifications when someone replies to your comment (if emails are configured).
- Moderation email: this is the email address that new comment notifications will go to.
- Amazon SES config: this is the optional config for setting up email notifications with Amazon SES.
All of the above (and more) is configurable after setup from the Pure Comments setting screen.
Embedding the comments form
Once you’ve setup Pure Comments, all you need to do now is add the embed code where you want comments to appear, and you’re good to go. The embed code will look something like this:
<div id="comments"></div>
<script src="https://comments.example.com/public/embed.js" defer></script>
Just replace comments.example.com with the URL of your Pure Comments instance.
Styling and the honeypot field
The embed.js script injects semantic HTML for the comment form and comments list without imposing rigid styling, allowing you to customise the interface to match your blog.
Crucially, the comment form includes a hidden anti-spam honeypot trap field (<input type="text" name="trap_field" class="hp-field">). Because embed.js provides unstyled markup, you must include CSS to hide this field.
Important: If your site does not include CSS to hide the honeypot field, visitors will see an extra, unlabelled input box above the submit button. If a real person types into this field, their comment will be flagged as spam and rejected!
You have two options for handling styling:
1. Porting the default stylesheet (Recommended)
Pure Comments includes an example stylesheet, comments.css, which provides clean, responsive styling for both light and dark modes, as well as rules to hide the honeypot field.
You can link directly to the stylesheet hosted by your Pure Comments instance by adding this to your site’s <head>:
<link rel="stylesheet" href="https://comments.example.com/public/comments.css">
Alternatively, you can download public/comments.css and include it in your site’s CSS assets.
If you are using Pure Blog, you can paste the stylesheet <link> tag directly into the Header Injection setting in your site configuration under Posts.
For full details on adjusting colours and layout, see the Theming Pure Comments guide.
2. Custom styling (Hiding the honeypot)
If you prefer to design your own custom CSS from scratch without using comments.css, you must at minimum add the following CSS rule to your site’s stylesheet to hide the honeypot field:
#comments .hp-field {
  position: absolute;
  left: -10000px;
  width: 1px;
  height: 1px;
  margin: 0;
  padding: 0;
  border: 0;
  opacity: 0;
  pointer-events: none;
}
This positions the honeypot off-screen rather than using display: none because some spam bots detect and skip fields hidden with display: none.
That’s it! Pure Comments is setup and you’re now ready to start receiving comments on your blog. 🎉